
If your humidifier’s leaking and wetting the floor, shut it down fast to limit damage and electrical risk. Kill power at the circuit breaker first, then set the humidistat to OFF and disable any remote controls so it can’t restart. Close the water supply valve feeding the 1/4-inch line by turning it clockwise. Don’t touch wet flooring or metal until you’ve confirmed power is dead. Next, check for active dripping and drain backups. Keep going to learn common leak causes and drying steps.
Humidifier Water Damage Signs (Leaks vs. Condensation)

If you notice dampness around your humidifier, you need to determine quickly whether you’re dealing with an active leak or normal condensation so you can prevent structural damage and contamination. Inspect for pooling at the base, localized wet spots, and drip paths. Look for active dripping or streaming from fittings, valves, ripped seals, internal cracks, or the reservoir. Check the water supply line for kinks or cracks and confirm no backup from a clogged drain hose or pan. If wetness persists after the unit is off, treat it as an ongoing leak. Document floor or wall staining near the unit and watch for mildew or mold concentrated in one area.
Condensation presents differently: you’ll see uniform dampness on cool surfaces like windows, with no drips and no standing water. Expect white dust or crusty mineral deposits on the nozzle or tank and a temporary film on furniture from aerosolized minerals. If you notice a musty odor, it can signal mold or bacteria growth inside the unit.
Stop Humidifier Water Damage Fast: Power Off, Then Water Off
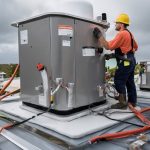
Act fast and shut the humidifier down in the correct order: kill power first at the circuit breaker or disconnect (lock it OFF so it can’t restart), then close the water supply valve feeding the quarter‑inch line by turning it clockwise until it stops. Don’t touch wet flooring, duct metal, or the cabinet until you’ve verified the circuit is dead. If you can, disconnect all live conductors at the service switch and confirm the humidifier won’t energize.
Next, trace the quarter‑inch copper or plastic feed line from the humidifier to its valve near the unit or at the main. Turn it fully clockwise; a saddle valve may not seal 100%, but it should slow flow dramatically. Watch the unit for continued dripping to confirm shutoff. Then set the humidistat to OFF (or lowest setting) and disable any remote controls to prevent automatic restart. This quick shutdown can also help prevent mold growth, as storm preparedness is essential in mitigating potential water damage risks.
Humidifier Leak Causes: Float Valve, Solenoid, Drain Clogs
With power locked out and the feed valve closed, pinpoint the leak source before you restore service, because most humidifier overflows trace to control and drainage failures rather than a cracked cabinet. Start at the float valve: confirm the float moves freely and rises to shut the inlet at the correct tray level. Check for misalignment, binding, and warped gaskets (often every 1–2 years) that let water bypass and drip. Inspect any water-level sensor bob/magnet; breakage or misreads can hold the valve open or shut it early. Next, verify the solenoid valve. Identify whether you have a 24V or 110V coil, disconnect the wires, and test continuity with a multimeter; a failed coil may show open circuit and won’t open despite voltage. If the valve won’t open, confirm the transformer is providing 24 volts. Finally, inspect drainage and supply restrictions: mineral sediment clogs saddle valves, lines, nozzles, and wicks, causing backups and overflow paths. Clear or replace clogged parts.
Prevent Mold After Humidifier Water Damage (Drying + 30–50% RH)

Once you’ve stopped the leak, shift immediately to drying and humidity control so mold spores don’t colonize damp materials. Dry all wet areas within 48 hours. Extract standing water with a wet/dry vac, then run commercial air movers across floors and up walls. Add heavy-duty, ductable dehumidifiers with condensate pumps to pull moisture from the air and push airflow into affected zones. Don’t miss hidden reservoirs: behind baseboards, inside wall cavities, under ceilings, and in crawl spaces or attics. Increase air circulation and slightly raise surface temperature to reduce condensation.
Control indoor RH with a hygrometer and keep it at 30–50% (never above 60%). If outdoor air is warm and humid, don’t “air it out”; dehumidify instead. Use an air scrubber if you suspect spore release. Proper maintenance with regular cleaning helps prevent mold issues. Clean the humidifier before reuse.
Frequently Asked Questions
Will Homeowners Insurance Cover Humidifier-Related Water Damage and Mold Remediation?
You’re in luck: your homeowners insurance often covers humidifier water damage if a sudden, accidental discharge causes it. You’ll still meet your deductible and stay within Coverage A/C limits; it won’t pay to fix the humidifier itself. You typically won’t get coverage for gradual leaks, neglect, wear-and-tear, or improper installation. For mold, you’ll get coverage only when it directly follows a covered sudden loss, often with sublimits or riders.
How Much Does Professional Humidifier Repair Typically Cost, Including Parts and Labor?
You’ll typically pay $130–$404 for professional humidifier repair, with an average around $250, including parts and labor. Techs often charge $50–$70/hr (or $100–$250/hr HVAC), plus a $100–$200 minimum service fee; flat rates may bundle these. Expect parts like pads $10–$50, sensors $80–$200, valves $100–$250, motors $150–$400. After-hours calls increase costs.
Should I Replace the Humidifier Pad/Filter After a Leak or Flood Event?
Yes—you should replace the humidifier pad/filter after any leak or flood. You can’t reliably clean out mineral crust, sediment, or contamination, and a clogged pad will drip, re-flood, and strain your HVAC blower. Shut the unit off, close the water supply, pull the housing, and discard the old pad. Install a genuine replacement with the colored/painted side up, drain hole down, then reseat and reconnect tightly.
Can Hard Water Cause Recurring Humidifier Failures, and Should I Add a Water Softener?
Yes—hard water can cause recurring humidifier failures, and you should add a water softener. Mineral mist, muck, and matrix-like scale clog nozzles, crust coils, and stiffen sponges, driving downtime and drift in RH control. You’ll also spread white dust and boost biofilm risk. Procedure: test water hardness, inspect for scale monthly, flush per manual, and route softened/RO or demineralized water to the unit to cut buildup.
When Should I Call a Plumber Versus an HVAC Technician for Humidifier Issues?
Call a plumber when you can’t isolate the leak to the humidifier: you see pipe/fixture leaks, toilet overflow, sewer backup, main shutoff/valve problems, or your water meter still moves after shutdown, suggesting a hidden line leak. Call an HVAC technician when the leak clearly comes from humidifier components—clogged solenoid, evaporator panel, scale insert, or dirt buildup—within HVAC integration points.